
How to Activate Microsoft Office Safely
A complete guide on activating Microsoft Office using the Ohook method, ensuring security and efficiency.
How to Activate Microsoft Office Safely#
Activating Microsoft Office securely and efficiently is crucial for users who rely on Office applications for work and study. This guide provides step-by-step instructions for activating Office using Ohook, a widely trusted and safe method.
🛠 Prerequisites#
-
Install Office Before Activation
Ensure that you have Microsoft Office (2013 to 2024/365) installed. Download the official setup from Microsoft’s website ↗ to avoid security risks. -
Activation Method: Ohook
Ohook is a recommended method for permanently activating Office. However, keep in mind that after reinstalling your operating system, you will need to reactivate Office.
Activation Steps#
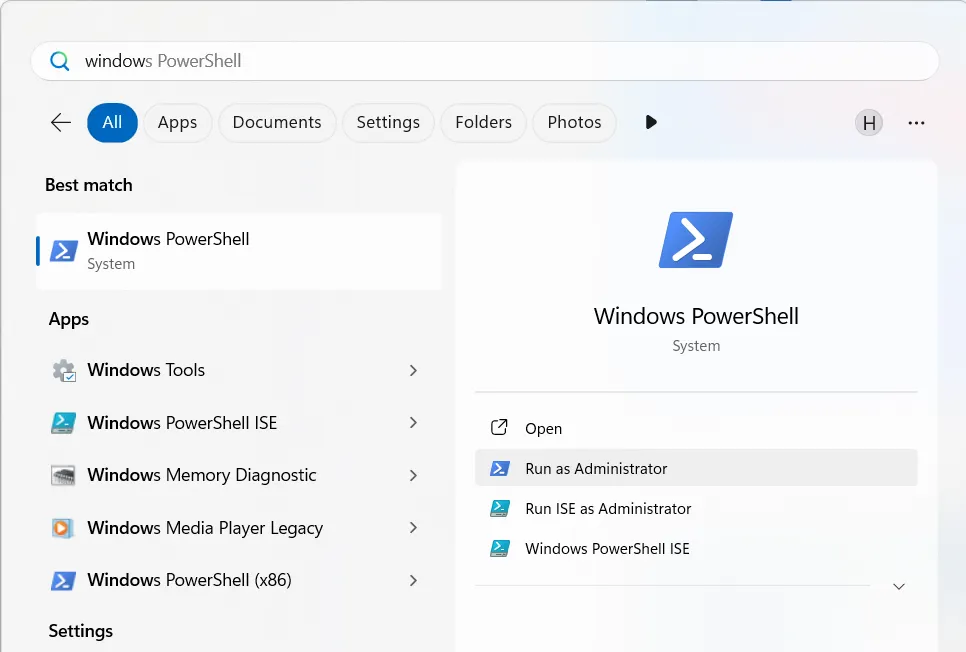
Step 1: Open Windows PowerShell with Administrator Privileges#
- Search for PowerShell in the Windows search bar.
- Right-click on Windows PowerShell and select Run as Administrator.
Step 2: Grant Permission#
- When prompted by the User Account Control (UAC), click Yes to proceed.
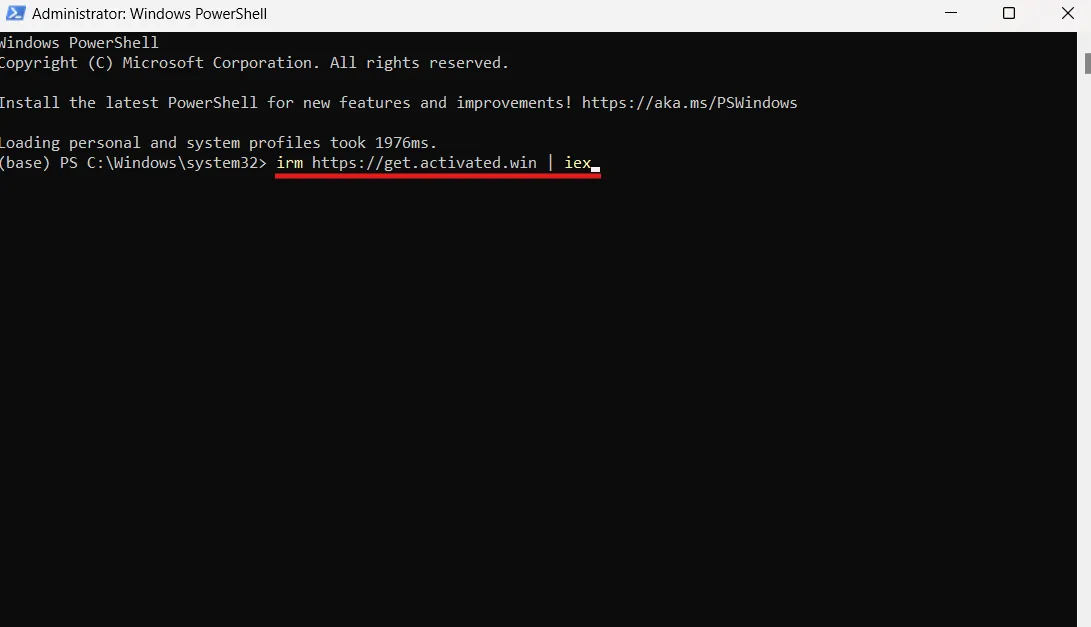
Step 3: Run the Activation Command#
-
Copy and paste the following command into the PowerShell window and press
Enter:
powershellirm https://get.activated.win | iex -
Step 4: Choose Activation Method#
- When the Ohook interface appears, type
2to select Office activation. 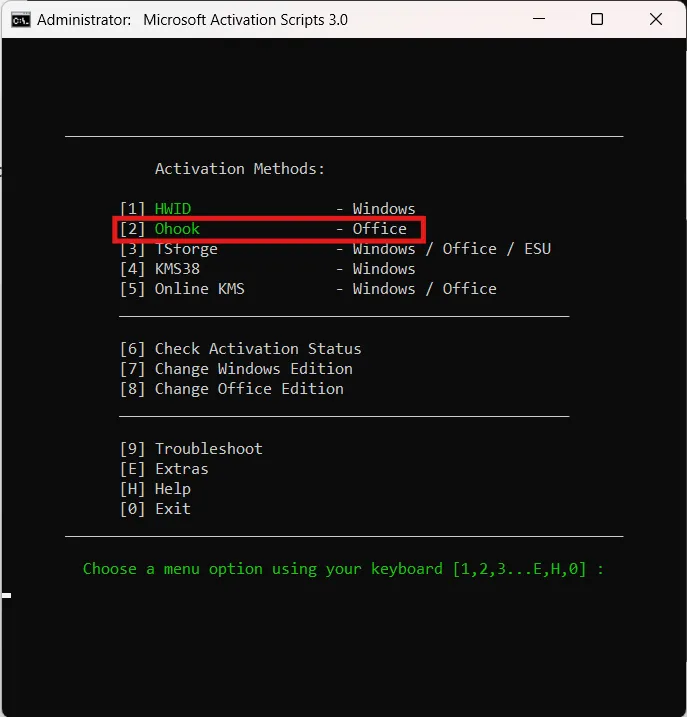
Step 5: Confirm Activation#
- Enter
1to confirm the activation process. 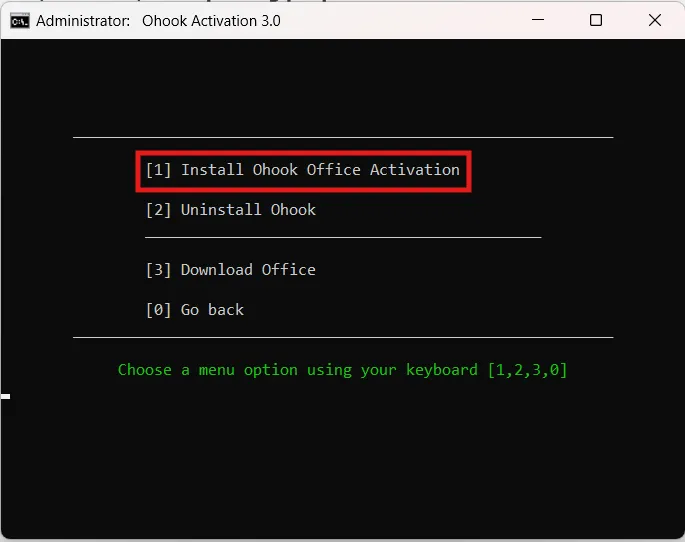
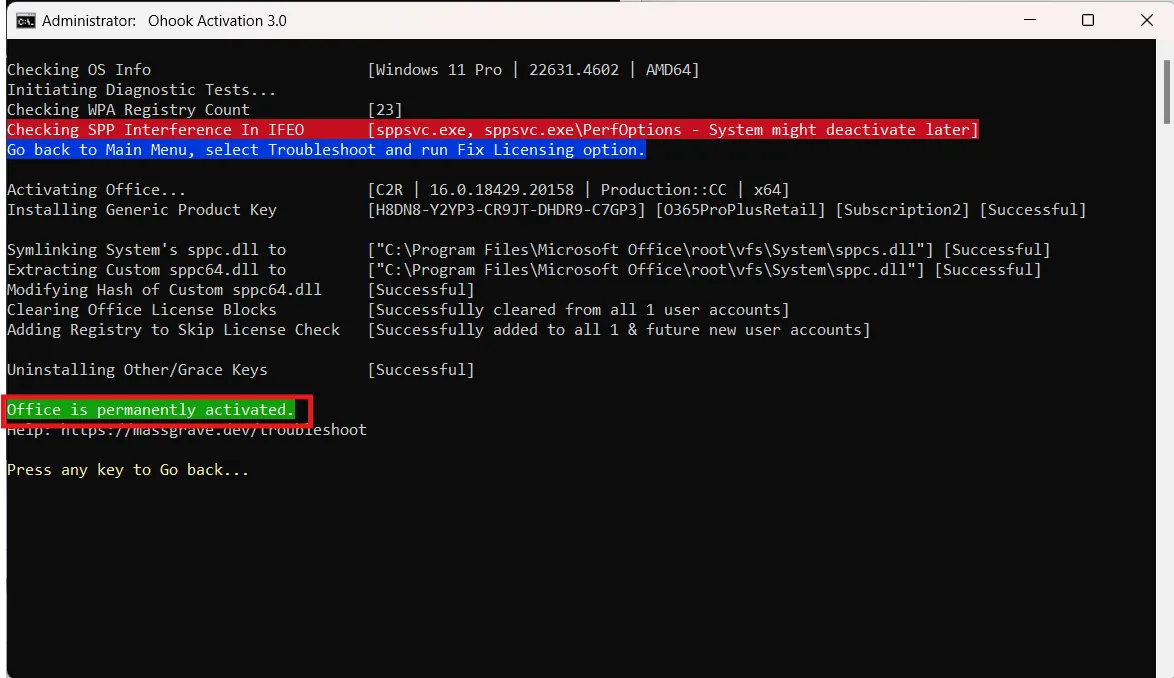
Step 6: Complete the Process#
- Once a green confirmation message appears, your Office is successfully activated. Press any key to exit.
Understanding Ohook#
Ohook is an open-source activation tool, meaning its source code is publicly available for verification. Unlike unauthorized activators, Ohook does not modify Microsoft’s files, ensuring a stable and update-friendly activation process. However, after reinstalling Windows, you must repeat the activation.
Verified by: The Nghiện Plus Official ↗ for ensuring that the process is up-to-date and functional.